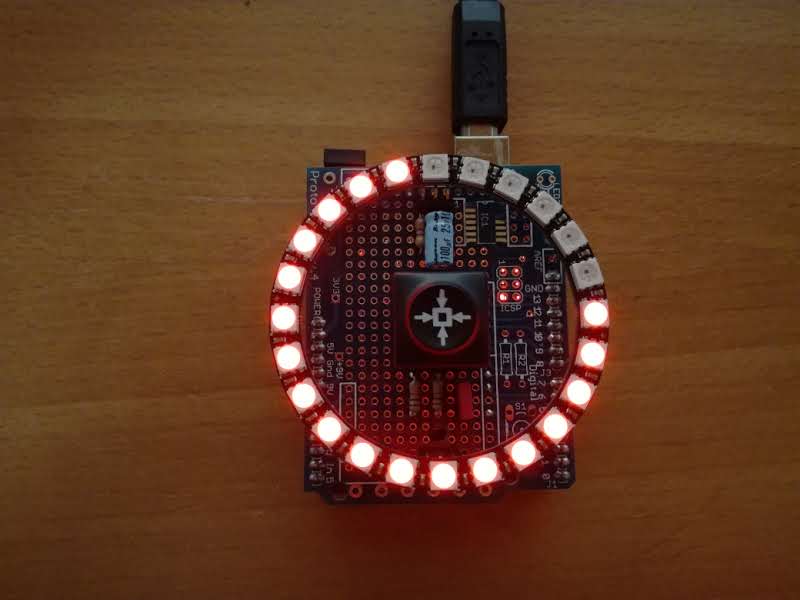
In this post we’ll go though what it takes to configure some Arduino libraries for the nRF24L01 modules and the DHT22 sensors. The hardware will in both cases be an Arduino UNO with the perf board shield described in my last post.
How to probe a DHT22 sensor from an Arduino
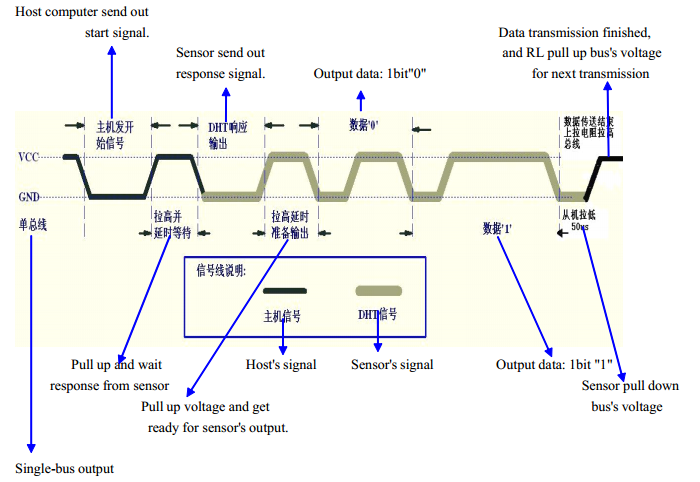
Let’s start by looking at how to talk to a DHT22. The DHT22 sensor uses a homemade 1-wire protocol for communicating with its host. The data transmission is initiated by the host by pulling the data pin low for 20 ms. Then the host pulls the data pin high for 40 ms. Finally, the sensor will transmit 40 bits by pulsing the data pin. Short pulses (26-28 microseconds) mean 0 and long pulses (70 microseconds) mean 1. Bytes 0 and 1 are the relative humidity and bytes 2 and 3 are the temperature. In both cases the first byte is the integral part while the second byte is the decimal part. The final byte is a checksum, which is simple the least significant byte of the sum of the previous 4 bytes. See the data sheet for more details on this.
DHT22 handshake (as shown in the data sheet)
Luckily, all the hard work has been taken care of. To get started, grab a copy of Adafruit’s DHT22 library and unpack it to your Arduino library folder. Then open the Arduino IDE and open the DHT/DHTtester example. The only piece of configuration needed is which pin the sensor’s data pin is connected to. In my case it is analog input pin A5, which can also be used as digital pin 19. I simply changed #define DHTPIN 2 to #define DHTPIN 19. Upload the compiled code and open the serial monitor. Remember to set the baud rate to 9600. If all went well, you should be greeted with something like this:
DHTxx test!
Humidity: 23.90 % Temperature: 26.20 *C
Humidity: 23.90 % Temperature: 26.20 *C
Humidity: 23.90 % Temperature: 26.20 *C
Humidity: 23.90 % Temperature: 26.20 *C
Humidity: 23.90 % Temperature: 26.20 *C
Humidity: 23.90 % Temperature: 26.20 *C
Humidity: 23.90 % Temperature: 26.20 *C
Humidity: 23.90 % Temperature: 26.20 *C
Humidity: 23.80 % Temperature: 26.20 *C
The library code looks simple enough to optimize for size. We don’t need all the bells and whistles for our sensor nodes.
How to make a configure and use an nRF24L01 radio module from an Arduino
There is a great data sheet for the chip at Nordic Semiconductor’s website. From this data sheet it’s entirely possible to write a library from scratch. But for prototyping it’s better to stand on the shoulders of giants instead of re-inventing the wheel. Let’s use an existing library.
As I’ve mentioned earlier, there are already great libraries for this online. Basically, there are two worth mentioning: Maniacbug’s RF24 library and the smaller Mirf library. We will be using the former as it’s the most complete of the two. I have noticed that there are several forks of this library on GitHub, so it may be best to shop around a bit to find the best match for our purposes. Download a zip and expand the contents to your Arduino libraries folder.
We are going to test radio connectivity using the RF24/pingpair_dyn example. There are lots of settings to configure, but as a bare minimum we need to configure which pin is CE, which pin is CSN, and the role of the node (i.e. if we are the pinging part or the ponging part of the pair). Conveniently, the defaults for CE and CSN are the ones I’m using (i.e. digital pins 9 and 10). This can be changed in line 26 where it says RF24 radio(9,10);. Remember that no matter which pins you use, you must have pin 10 configured as an output for the SPI hardware to work in master mode. Else, it will run in slave mode and the code won’t work.
The default behavior for the RF24/pingpair_dyn example is to be the pinging part. Let’s just keep it that way and configure the Raspberry Pi to be the ponging part. Now try to compile and upload the code. Without a pong-partner, the pings will just time out, but at least we know something is working. Remember that this test uses 57600 baud per default when using the serial monitor. The output should look something like this:
RF24/examples/pingpair_dyn/
ROLE: Ping out
STATUS = 0x0e RX_DR=0 TX_DS=0 MAX_RT=0 RX_P_NO=7 TX_FULL=0
RX_ADDR_P0-1 = 0xf0f0f0f0e1 0xf0f0f0f0d2
RX_ADDR_P2-5 = 0xc3 0xc4 0xc5 0xc6
TX_ADDR = 0xf0f0f0f0e1
RX_PW_P0-6 = 0x20 0x20 0x00 0x00 0x00 0x00
EN_AA = 0x3f
EN_RXADDR = 0x03
RF_CH = 0x4c
RF_SETUP = 0x07
CONFIG = 0x0f
DYNPD/FEATURE = 0x3f 0x04
Data Rate = 1MBPS
Model = nRF24L01+
CRC Length = 16 bits
PA Power = PA_HIGH
Now sending length 4...Failed, response timed out.
Now sending length 6...Failed, response timed out.
Now sending length 8...Failed, response timed out.
Now sending length 10...Failed, response timed out.
If something is wrong (e.g. if the SPI interface has been configured incorrectly), the code will fail to recognize the radio. Then the output in the serial monitor will look like this:
RF24/examples/pingpair_dyn/
ROLE: Ping out
STATUS = 0xff RX_DR=1 TX_DS=1 MAX_RT=1 RX_P_NO=7 TX_FULL=1
RX_ADDR_P0-1 = 0x0000000000 0x0000000000
RX_ADDR_P2-5 = 0xff 0xff 0xff 0xff
TX_ADDR = 0xffffffffff
RX_PW_P0-6 = 0x00 0x00 0x00 0x00 0x00 0x00
EN_AA = 0xff
EN_RXADDR = 0xff
RF_CH = 0xff
RF_SETUP = 0xff
CONFIG = 0xff
DYNPD/FEATURE = 0x00 0x00
Data Rate = 1MBPS
Model = nRF24L01
CRC Length = 16 bits
PA Power = PA_HIGH
Now sending length 4...Got response size=255 value=ÿÿÿÿÿÿÿÿÿÿÿÿÿÿÿÿÿÿÿÿÿÿÿÿÿÿÿÿÿÿÿ
Now sending length 6...Got response size=255 value=ÿÿÿÿÿÿÿÿÿÿÿÿÿÿÿÿÿÿÿÿÿÿÿÿÿÿÿÿÿÿÿ
Now sending length 8...Got response size=255 value=ÿÿÿÿÿÿÿÿÿÿÿÿÿÿÿÿÿÿÿÿÿÿÿÿÿÿÿÿÿÿÿ
Now sending length 10...Got response size=255 value=ÿÿÿÿÿÿÿÿÿÿÿÿÿÿÿÿÿÿÿÿÿÿÿÿÿÿÿÿÿÿ
Assuming all went well, we are now done testing the Arduino libraries. Ultimately, they will be used as inspiration for the sensor node firmware. My next post will be about getting the Raspberry Pi to talk to the radio modules. In the end we should have a working ping/pong test running.