Creating a python module for the Contec CMS50D+ pulse oximeter (Part II)

So, in my previous post, I wrote a bit about retrieving live 60 Hz data from a Contec CMS50D+ pulse oximeter. As mentioned, the device also has another standalone mode where it records pulse rate and blood SpO2 at 1 Hz for up to 24 hours. That is, if your batteries last that long. This thing is quite power hungry.

You can read all about the recording mode in the manual. In this post I’ll focus on the actual data download from the device. There’s really not much to it, so it will be a short post this time…

Let’s look at some recorded data

Whereas the live-mode is strictly one-way, the recorded mode involves a tiny bit of two-way communication to work. You should enable xonxoff to convince Python to talk to the device. The protocol goes as follows:

  • Open a connection at 19200 baud, 1O8 with xonxoff enabled.
  • Listen for live data. If we get none, the device is disconnected or turned off.
  • Send [0xF5, 0xF5]. This switches the device to download mode.
  • Wait for the preamble. It’s three times [0xF2, 0x80, 0x00]. In the beginning we might also have some leftover live data.
  • Then we get the content length as three bytes. See below for an explanation.
  • Receive the specified number of bytes. Each measurement is three bytes. See below for an explanation. Sometimes the download fails and halts midway for some reason and has to be restarted.
  • Send [0xF6, 0xF6, 0xF6]. This switches the device back into live mode.
  • Disconnect.

Now you should have a bunch of data to insert into a spreadsheet or whatever.

The length header

The length header tells us how many bytes of data the device will send. It consists of three bytes. The first two bytes always have their MSB set while it’s never set on the last. This gives us 21 useful bits which is enough. If we have recorded 24 hours of data, this will yield 24 * 60 * 60 = 86400 measurements. And if each measurement is three bytes, then the maximum content length will be 259200 bytes. This only requires 18 bits.

Curiously enough, the content length is always one off compared to the actual data length. So we need to add 1 to the result. Let’s look at an example:

  • We have received the length header [0x81, 0x8A, 0x2C].
  • Validate and strip off MSBs from the first and second byte. Now we have [0x01, 0x0A, 0x2C].
  • Left-shift the first byte by 14 bits and the second byte by 7 bits. Combine the three numbers by using the bitwise OR operator. Now we have 0x452C or 17708 in decimal.
  • Add 1 to the result. This means that the content length is 17709 bytes.
  • Each measurement is three bytes, so we have 17709 / 3 = 5903 measurements. As the device samples at 1 Hz, this means 1 hour 38 minutes and 23 seconds worth of data.

The measurements

Each measurement consists of three bytes.

  • The first byte is always 0xF0 or 0xF1. The 1 is the MSB of the pulse rate in the next byte.
  • The second byte is the pulse rate. As the device only utilizes 7 bits per byte for data, the MSB is moved to the first byte. A human pulse rate can quite easily go over 127 BPM…
  • The third byte is the SpO2 percentage.

That’s it!

Again, all code for this project can be found on GitHub. If you have any questions, please comment below.

Creating a python module for the Contec CMS50D+ pulse oximeter (Part I)

Some time ago I wrote a bit about how to download data from a Beurer BM65 blood pressure monitor to my PC via USB using a homemade Python module. That was good fun, so when I discovered the Contec CMS50D+ pulse oximeter (which also has USB connectivity) on everybody’s favorite online auctioning site for ~$40 including shipping, I had to buy one.

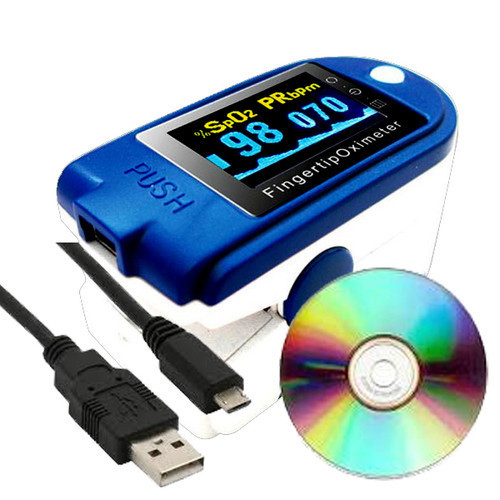
Contec CMS50D+

Contec CMS50D+

So, what’s in the box?

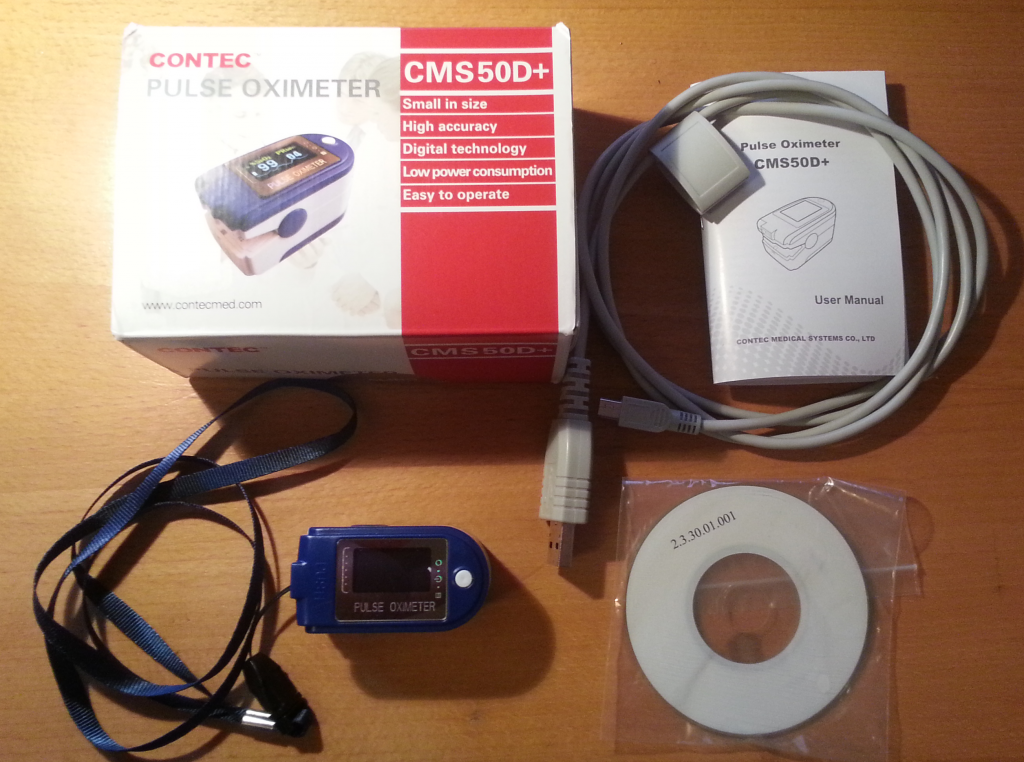
Apart from the device itself, the box contains a special USB cable (we’ll get back to this), a lanyard (because why not), no batteries, a small mysterious CD-ROM, and a surprisingly well-written English instruction manual. The device works as expected and outputs plausible data on it’s little display, which is very crisp by the way. I can’t vouch for the validity of the blood oxidation level, but the pulse stuff seems pretty precise at least. However, this is not the important part of this blog entry. Let’s focus on getting data off the damn thing without having to rely on the official software.

Contec CMS50D+ box content

Contec CMS50D+ box content

Plugging it in

Others have already reverse engineered the protocol of this device, but let’s have a look at the bundled software anyway. After updating all the anti-malware software on my Windows box, I tried putting in the CD-ROM. So far it seems benign enough. It contains a single executable that installs a driver and two applications: one for live data display and one for downloading up to 24 hours of recorded data from the device. The software isn’t actually half bad, but as usual it’s unfortunately Windows-only. It runs in Wine, but sadly fails to connect to the device.

The bundled driver is for the Silicon Labs CP210x series of USB to UART converters, which simplifies things considerably. Now it’s just a matter of sniffing some serial traffic. In Linux, dmesg agrees with this when the device is plugged in:

CP2102 detected!

CP2102 detected!

Fun fact: The CP2102 chip is also detected if I only plug in the bundled USB cable and leave the pulse oximeter itself disconnected. Apparently this cable has a built-in USB to UART converter! That’s a bit weird considering the mini-USB plug at the other end… Even though the device itself sports a mini-USB connector, it’s not actually USB compliant and it won’t work at all with regular USB cables. So don’t throw away the special “USB cable”!

Let’s look at some real-time data

The device has two modes: real-time data and recorded data (up to 24 hours). The former streams data via the USB connection as it’s measured, while the latter is useful for situations where a running PC would be impractical. The real-time mode offers relatively rich 60Hz data while the historical mode only supports 1Hz averaged pulse and Spo2 readings. Coding-wise the real-time mode is the simplest as its protocol is one-way, so it’s a good place to start. I’ll cover the recorded data mode in another post.

Anyway, I tried starting the live data application through API Monitor v2 like I did for the blood pressure monitor. Immediately when the live data application starts, it starts spamming the SetCommState API call in Kernel32.dll trying to open all available COM ports at 4800, 19200, and 115200 baud in quick succession. All three bitrates are configured as 8O1 (oddly enough). Perhaps this is in order to support several slightly different devices?

Another slightly odd thing is that the device is always transmitting data without any handshake. All the computer has to do is to open the right virtual serial port at 19200 baud 8O1. Yet another slightly odd thing is the protocol itself. Each data packet is 5 bytes long and according to some documentation found on the web, 60 packets are sent per second. The first byte always has its MSB set to 1 while the four others always have it set to 0. According to said documentation, the meaning of the 5 bytes are as follows (spelling errors and all):

bytebitcontent
10~3Signal strength for pulsate(0~8)
41=searching too long,0=OK
51=dropping of SpO2,0=OK
61=beep flag
7Synchronization,always be 1
20~6pulse waveform data
7synchronization,always be 0
30~3bar gragh (stand for pulsate case)
41=probe error,0=OK
51=searching,0=OK
6bit 7 for Pulse Rate
7synchronization,always be 0
40~6bit 0~bit 6 for Pulse Rate
7synchronization,always be 0
50~6bit 0~bit 6 for SpO2
7synchronization,always be 0

I think this information is for a slightly different model (hence the 4800 baud setting instead of my device’s 19200 baud), but it seems legit. In any case, I have yet to see data that doesn’t make sense according to this table.

Like last time, I have implemented a small python script that is able to connect to the device. It takes a few command line arguments and outputs a CSV file with the received data.

All code for this project can be found on GitHub.

Next up: Retrieving historical data for the last 24 hours… Stay tuned…

RPIWeather: My wireless monitoring system

Some of the first posts on this blog were about how to interact with the famous nRF24L01 2.4GHz radio chipset from both an Arduino and a Raspberry Pi. Well.. Much have happened in the mean time, but at least I have managed to put together something using what I learned back then. I decided to make a wireless monitoring system for environmental data in and around our house with at least one sensor node in each room as well as a couple of sensors outside. It is called RPIWeather and you can get all the code and documentation by clicking the name. This post is just meant as a short summary.

RPIWeather consists of a bunch of wireless sensor nodes, a base station that collects the data packets, a database server, and one or more frontends. My goal has been to collect data at 5 minute intervals and keep it indefinitely for analysis, comparison, and visualization. This creates some demands for power efficiency and reliability, which I find interesting.

The sensor nodes

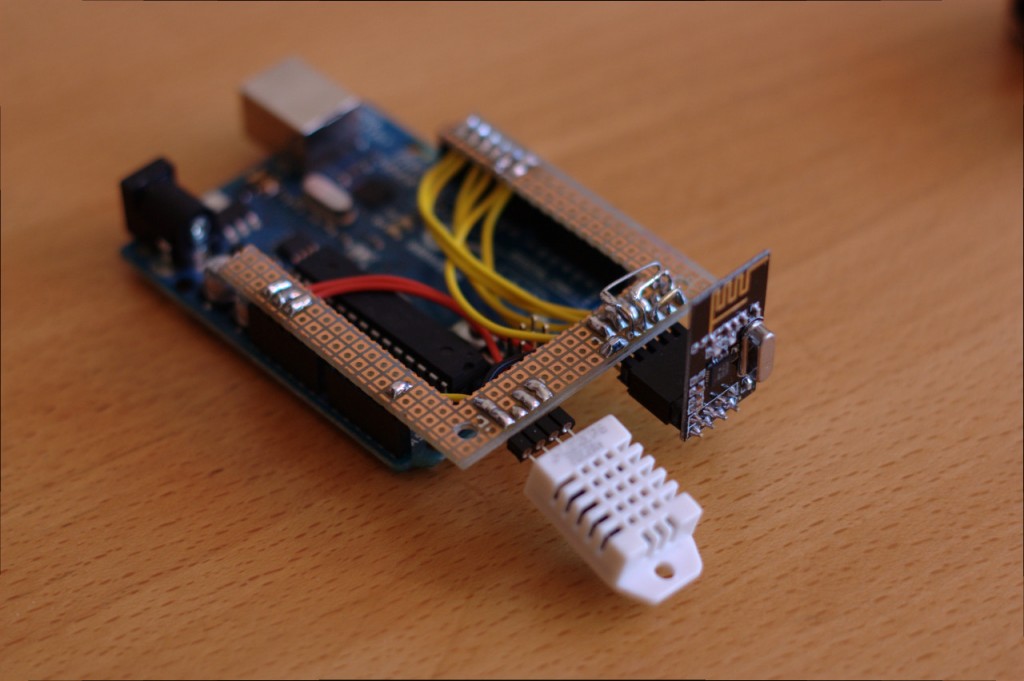
My first prototype was based around an Arduino and some proto-board and is described here, here, and here. It looked like this:

Arduino with nRF24L01 and DHT22

Arduino with nRF24L01 and DHT22

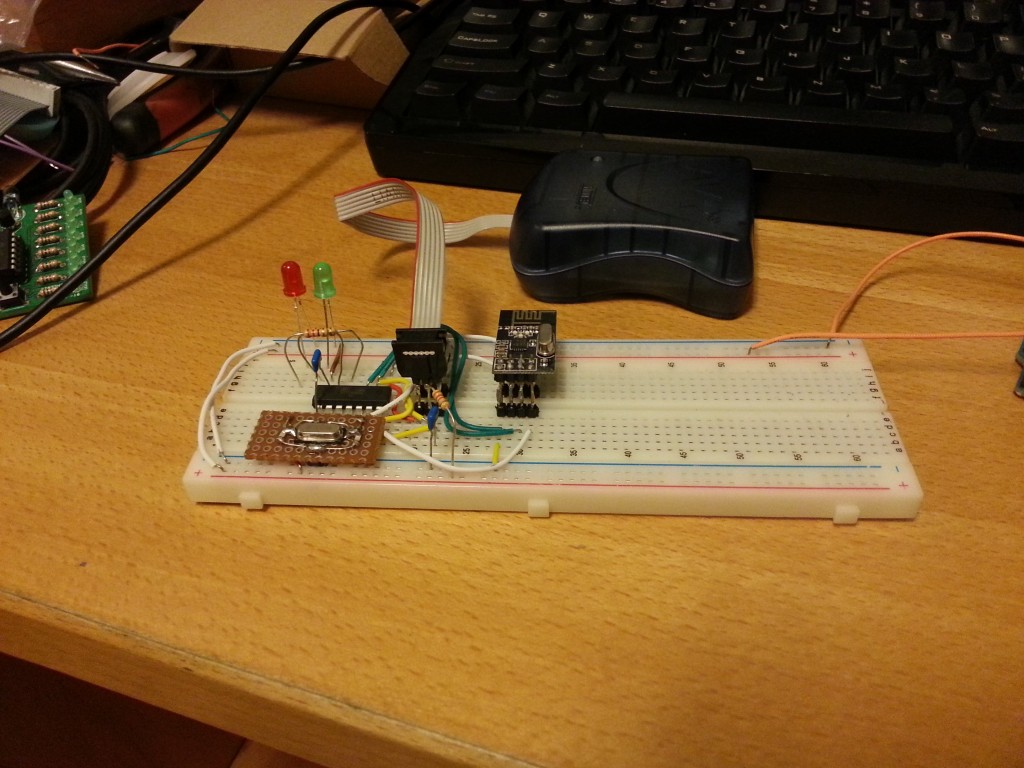
To keep things simple, clean, and small, I decided to ditch the Arduino platform and code in straight avr-libc for the ATtiny84 chip from Atmel. So I made another prototype, but this time with an ATtiny84 instead.

Partial prototype without the DHT22 sensor

Partial prototype without the DHT22 sensor

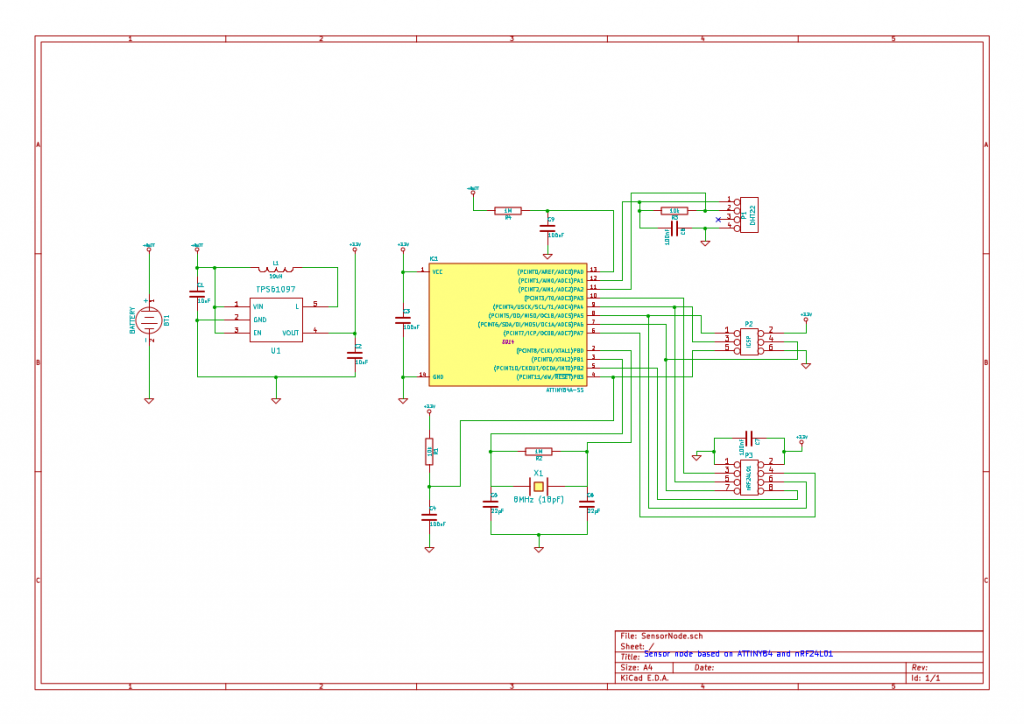
Little by little a schematic emerged. Besides the radio, the sensor and the MCU, I also needed some sort of power supply. As the sensor nodes are to be distributed throughout the house, this implied battery power, but it couldn’t just be any old battery. The thing is that the radio chip can only tolerate up to 3.6v and the DHT22 sensor can only operate down to ~3v, which leaves a narrow band of usable voltages. A traditional voltage regulator would have burned though the batteries quite quickly, so I had to put in a switching boost converter. This way 2 AA NiMH batteries can deliver a reasonably stable 3.3v supply voltage for the circuit. Pro tip: when buying NiMH batteries, do yourself a favor and use the low self-discharge kind like Eneloop. In this use-case they will go for several months between charges.

Schematic for the sensor nodes

Schematic for the sensor nodes

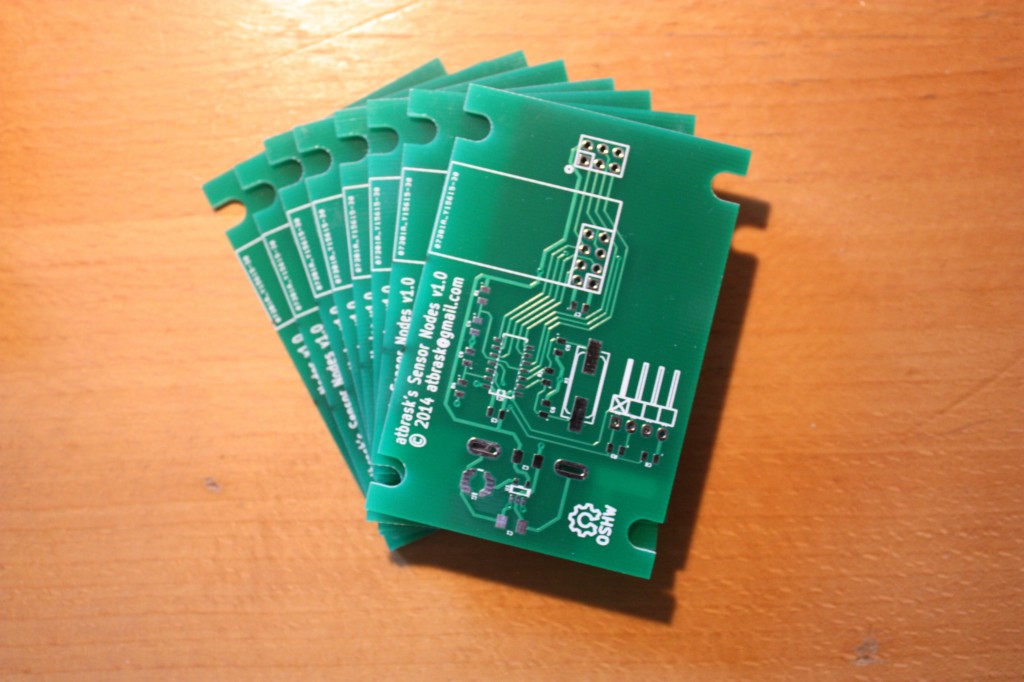
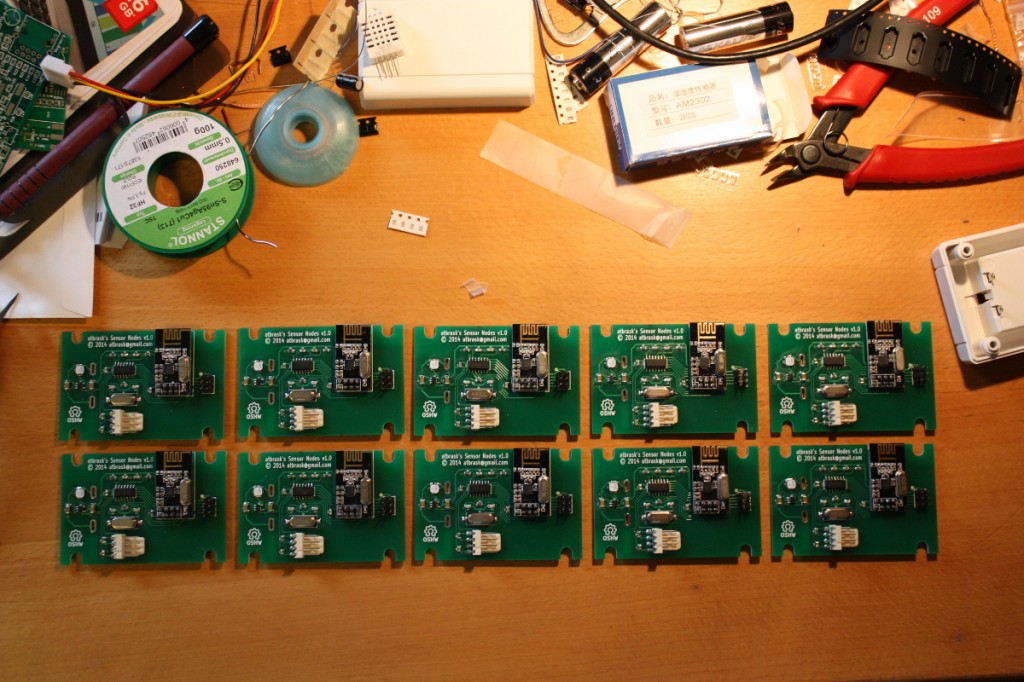
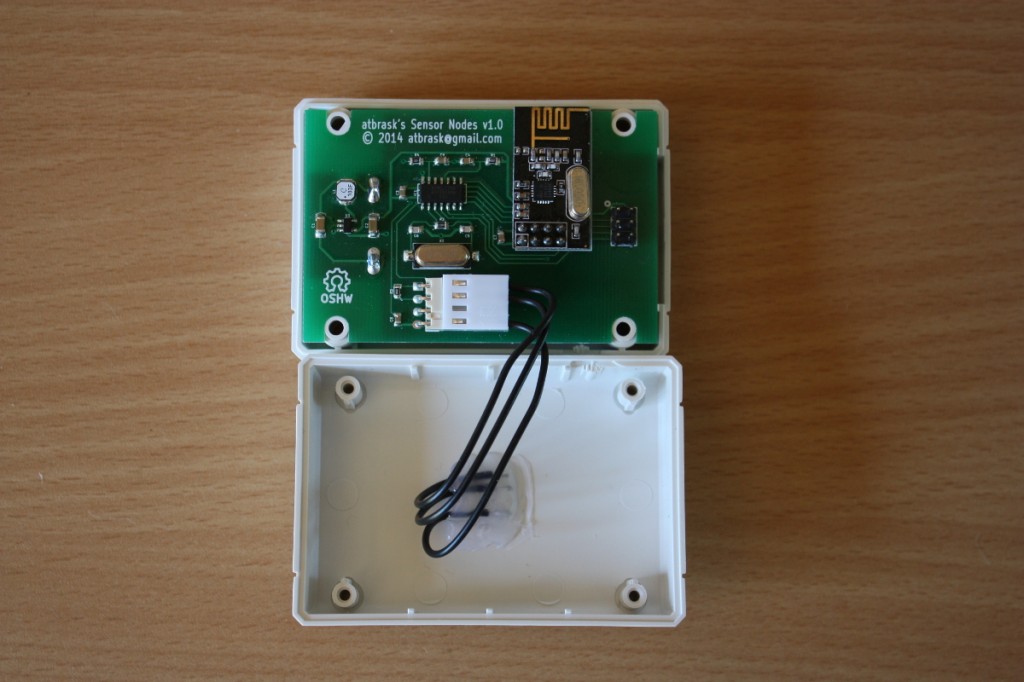
With the schematic in place, I made a PCB layout and sent it to ITEAD for manufacturing. Here are a couple of pictures showing various stages of assembly. The funny shape of the boards was needed to make them fit snugly into some cool boxes from New Age Enclosures.

Sensor node PCBs

Sensor node PCBs

The first 10 finished boards

The first 10 finished boards

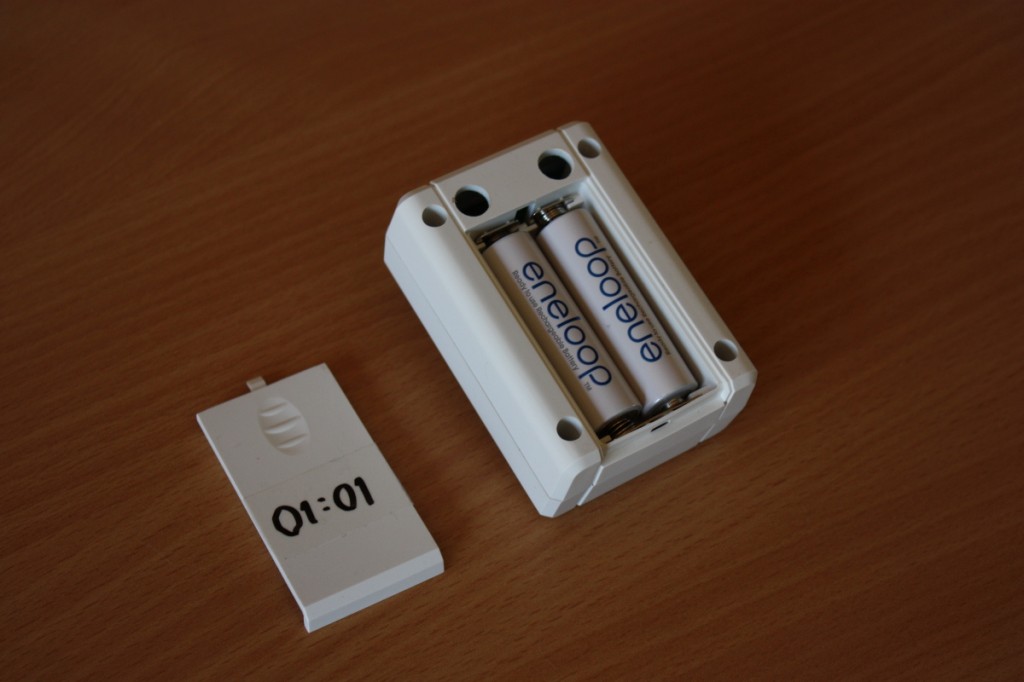
Inside a single sensor node

Inside a single sensor node

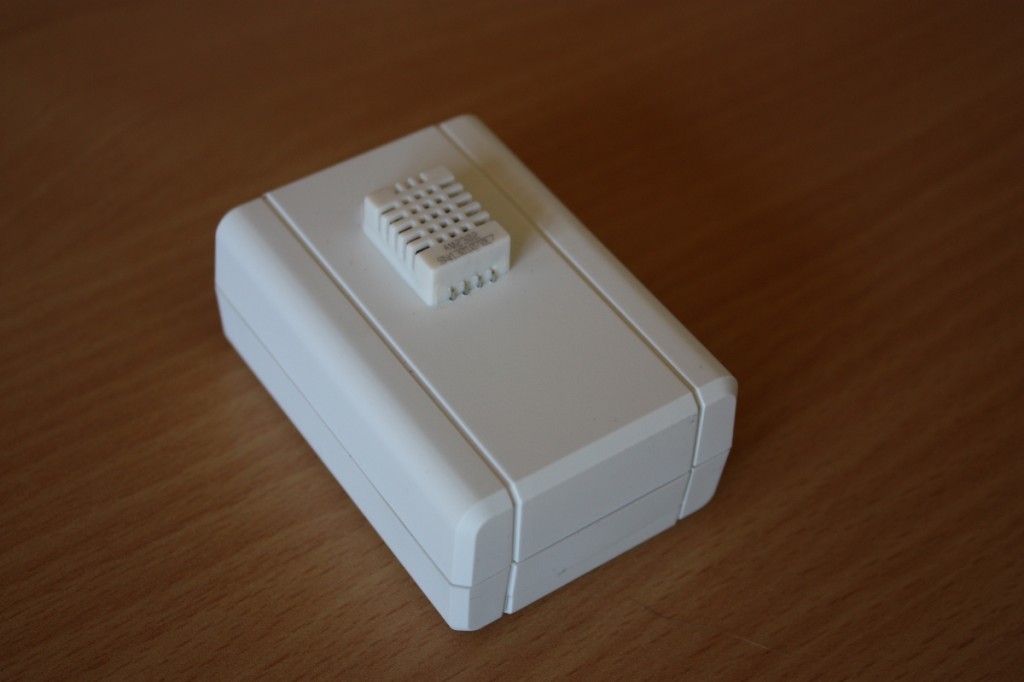
A single sensor node

A single sensor node

The back of a sensor node

The back of a sensor node

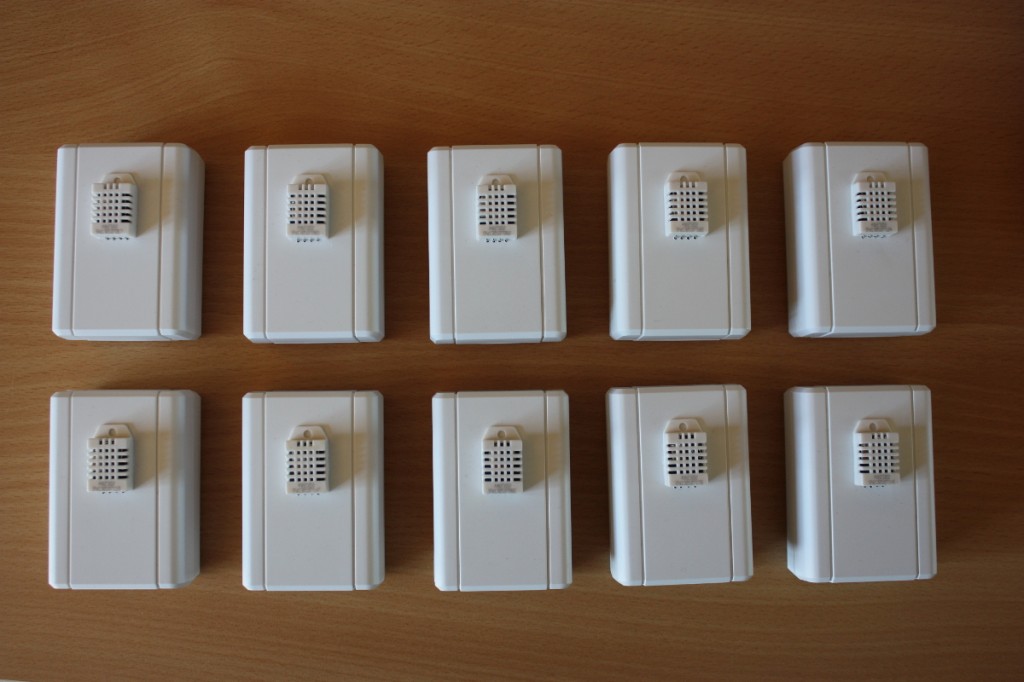
The 10 first sensor nodes

The 10 first sensor nodes

In addition to the DHT22 sensors, I have also made firmware for collecting data from a wind vane and a rain gauge. But I haven’t deployed any of that yet. Maybe next spring…

All in all the main results for the sensors are:

  • They work! I have tested concurrent operation of 10 units without major problems.
  • Firmware optimized for ATtiny84 @ 1 MHz (8MHz crystal with the CKDV8 fuse set)
  • Temperature and humidity measurement using a DHT22 sensor
  • Wind speed and wind direction measurement using a La Crosse TX23 anemometer
  • Rainfall measurement using a WS-2300-16 rain gauge
  • Wireless operation using the very popular nRF24L01+ 2.4 GHz radio chip
  • Very compact CRC32 implementation
  • Battery powered operation using a very efficient 3.3v DC/DC converter
  • Power management by sleeping the CPU and turning off unneeded hardware
  • Battery voltage measurement included in data packet
  • Typical battery draw while sleeping has been measured to around 17uA
  • Total firmware size from 3.0 kiB to 3.5 kiB (depending on sensor type)

The base station

I use a Raspberry Pi as base station. To make it more appliance-like than a typical Raspbian installation, I have instead installed a variant of Tiny Core Linux called piCore. This is basically a very small Linux distribution that loads all programs into memory on boot and leaves the SD card alone after this. This eliminates the usual risk of corrupting the file system when doing a power-cycle.

On the base station I have installed a small python script that continually polls the nRF24L01 radio using the Raspberry Pi’s built-in SPI interface pins. When a data packet arrives, it is buffered (in case of network problems) and forwarded to the database.

The database

With my limited data requirements, I could probably use any old database out there without issues. However, given the nature of the data, it was natural to select a so-called timeseries database. For this project I chose InfluxDB, which was very, very easy to set up on my Ubuntu-based file server. It automatically exposes a simple HTTP interface for storing and querying data, which is just what I need for this project.

The frontend(s)

Well, I’m not quite there yet… So far the only frontend is the admin interface that is built in to InfluxDB. Not very user friendly (not to mention the Wife Acceptance Factor)! The next step now is to make some sort of nice frontend for this. I have several ideas floating around my head:

  • An intranet website. The easiest way.
  • An Android widget. Both the wife and I have Android smartphones.
  • Dedicated hardware devices. This would be a great use-case for my new ESP8266 wifi modules and some 84×48 Nokia LCDs I have lying around.

Stay tuned…

What does a TrueType font look like on the inside? And how do you make one? (Part II)

In this post, I’m going to discuss a simple bitmap vectorization algorithm that’s compatible with TrueType. The goal is to convert a C64 character set to a usable TrueType font.

Most technical details about TrueType and character mapping (i.e. C64 character sets vs. PETSCII vs. ASCII vs. Unicode) can wait for the upcoming blog posts. However, there are already a few facts about C64 characters and TrueType we do have to keep in mind. These are:

  • Each C64 character glyph is 8×8 pixels, monochromatic, and monospaced. Because they are monospaced, we don’t have to concern ourselves with issues like kerning.
  • TrueType only has limited support for bitmap fonts. Therefore, we need to vectorize the 8×8 bitmaps. No need for fancy bezier curves. Just crisp retro-looking blocks with 90-degree corners.
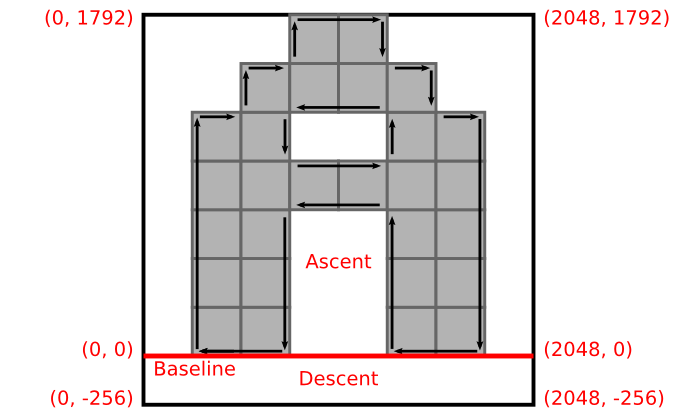
  • A TrueType-style glyph in its most basic form (without hinting) consists of a set of contours, and a contour consists of a set of points. Points in opaque contours are specified in clock-wise order and points in transparent contours (e.g. the “hole” in the letter O) are specified in counter-clockwise order.
  • Some letters go a bit below the baseline. The vertical range above the baseline is called the ascent and the range below is called the descent. Most C64 character sets seem to have an ascent of 7 pixels and a descent of 1 pixel.
  • Coordinates in a TrueType glyph are normally scaled such that the glyph will fit inside a 2048×2048 box. If the font has a non-zero descent specified, the Y-coordinate will be negative below the baseline. Assume a typical 8×8 pixel C64 character with a 1 pixel descent. In TrueType-terms each pixel would then be 256 units by 256 units, the lower left corner would be at (0, -256), and the upper right corner would be at (2048, 1792).
  • A contour should consist of as few points as possible in order to reduce complexity. Consecutive points along an axis can be simplified to include only the endpoints without any differences in the rendering of the glyph. Also, the last edge in a contour is implicit. The renderer will simply assume a direct line from the last point back to the first.

This ought to be enough for now. Let’s now try to convert the default C64 ‘A’-glyph to a TrueType-compatible vectorized form. In ASCII ‘A’ is char #65, but on a C64 in upper-case mode the character set is laid out as follows. In this mode there are 128 characters in both their regular form as well as an reverse video version:

Dump of C64 character generator data (upper-case mode)

Dump of C64 character data (upper-case mode)

Each character consists of 8 bytes that each describe a row of 8 bits. The top left pixel of a given character is the most significant bit in the first byte and the bottom right pixel is the least significant bit in the 8th byte. Let’s look at the first 24 bytes of this data:

0x3C, 0x66, 0x6E, 0x6E, 0x60, 0x62, 0x3C, 0x00, 0x18, 0x3C, 0x66, 0x7E, 0x66,  0x66, 0x66, 0x00, 0x7C, 0x66, 0x66, 0x7C, 0x66, 0x66, 0x7C, 0x00

We are interested in the second character, which is at bytes 0x08…0x0F. If we try to show these as binary with one number per line, we get something like this:

0x08: 0x18 = 0b00011000
0x09: 0x3C = 0b00111100
0x0A: 0x66 = 0b01100110
0x0B: 0x7E = 0b01111110
0x0C: 0x66 = 0b01100110
0x0D: 0x66 = 0b01100110
0x0E: 0x66 = 0b01100110
0x0F: 0x00 = 0b00000000

Or, a bit more clear like this:

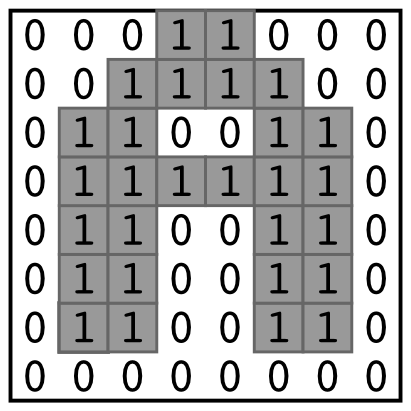
The letter 'A' on a C64.

The letter ‘A’ on a C64.

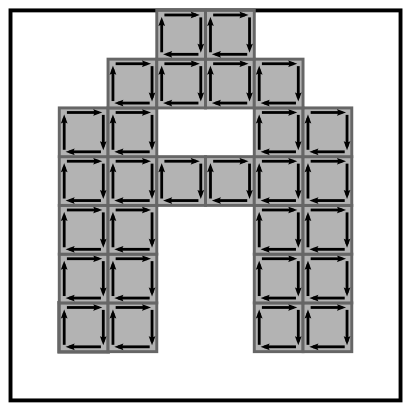
This looks like the letter ‘A’. Notice that it doesn’t go below the baseline (i.e. the lower-most row consists entirely of zeroes). But how do we make this into some nice vector contours? An easy way to vectorize a bitmap like this is to simply draw a clockwise box around each opaque pixel. This, however, is very wasteful:

Naive vectorization

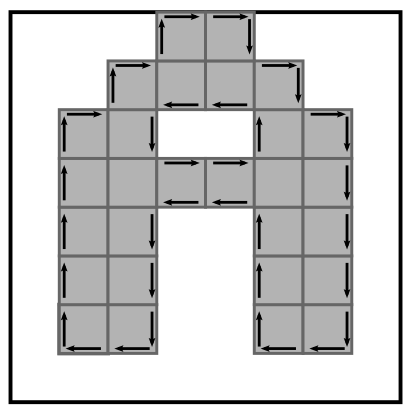
We are already getting close. Notice how all edges on the outside are going in a clockwise direction around the letter, and how the edges in the “hole” are going counter-clockwise. This is exactly what we want. But we only want edges on the boundary of the contours. In the picture above we have 28 opaque pixels with 4 edges each, resulting in 112 edges in total. That’s a bit too much. Let’s change the algorithm to skip all edges where the adjacent pixel is opaque. Then it looks something like this:

Unncessary edges removed

Unncessary edges removed (well, most of them..)

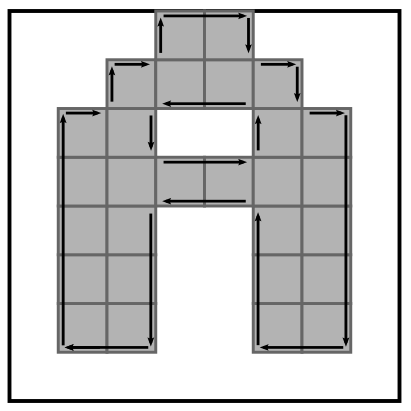
Now we are down to 38 edges. But we can do better. Quite a few edges are consecutive along an axis. These can be merged to yield simpler contours.

Almost there...

Almost there…

Now we are down to 20 edges with 16 in the outer clockwise contour and 4 in the inner counter-clockwise contour. Now we only have to scale the coordinates of the edges to fit a TrueType glyph. Remember that everything is supposed to fit within 2048×2048 units, giving a pixel size of 256×256. Then we are done:

Vectorization done!

Vectorization done!

In the TTX format of FontTools, this would look something like the following:

<TTGlyph name="A" xMin="256" yMin="0" xMax="1792" yMax="1792">
  <contour>
    <pt x="256" y="0" on="1"/>
    <pt x="256" y="1280" on="1"/>
    <pt x="512" y="1280" on="1"/>
    <pt x="512" y="1536" on="1"/>
    <pt x="768" y="1536" on="1"/>
    <pt x="768" y="1792" on="1"/>
    <pt x="1280" y="1792" on="1"/>
    <pt x="1280" y="1536" on="1"/>
    <pt x="1536" y="1536" on="1"/>
    <pt x="1536" y="1280" on="1"/>
    <pt x="1792" y="1280" on="1"/>
    <pt x="1792" y="0" on="1"/>
    <pt x="1280" y="0" on="1"/>
    <pt x="1280" y="768" on="1"/>
    <pt x="768" y="768" on="1"/>
    <pt x="768" y="0" on="1"/>
  </contour>
  <contour>
    <pt x="768" y="1024" on="1"/>
    <pt x="1280" y="1024" on="1"/>
    <pt x="1280" y="1280" on="1"/>
    <pt x="768" y="1280" on="1"/>
  </contour>
  <instructions><assembly>
    </assembly></instructions>
</TTGlyph>

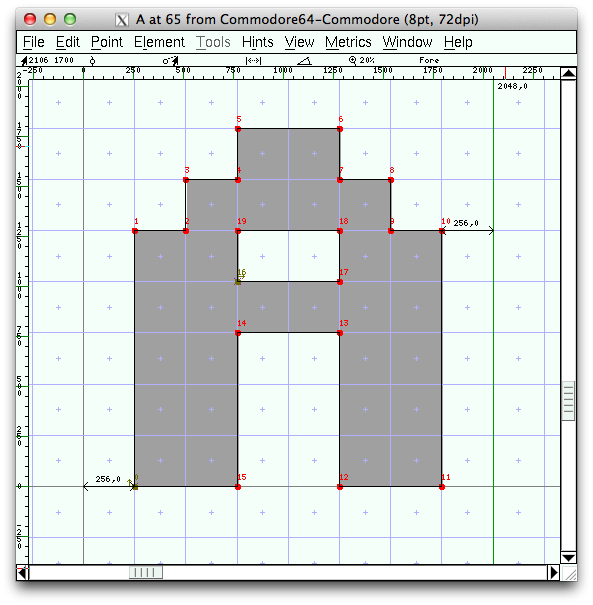
Finally, let me give you a sneak peek of what this character looks like in the TrueType font editor FontForge:

Screenshot of FontForge

Please have a look at the complete C64 to TTF python script if you want to know more about this. It can be found at my GitHub account.

Next time, I’ll talk a bit about how to map all the characters from the native C64 format into PETSCII, ASCII, and Unicode.

What does a TrueType font look like on the inside? And how do you make one? (Part I)

So, here the other day (actually a few months ago) I was looking for some retro-looking 8×8 pixel bitmap fonts for a project involving an old flip-dot display at My Friendly Local Hackerspace™. During this search I came across this website with more than 600 character sets from various old Commodore 64 games, applications, and demos. However, they are all in a very raw format where they are basically just partial memory dumps from running C64 games/demos. The author even mentions that he hasn’t found any easy way to convert them to a more useful format like, for example, TrueType. In fact, a Google search indicates that only very few C64 character sets are available for download as TrueType files. Most notable are the ones by Style64. However, they all seem to be more or less converted by hand using various font authoring tools. Well that’s not very elegant…

Somebody ought to do something!

Let’s explore what a TrueType font file looks like on the inside so we can create one ourselves. As I’ll cover later, it turns out to be quite possible to do with a bit of coding effort. In fact we don’t even have to do all the dirty work moving bits around and calculate checksums in a binary Truetype font file ourselves. There is (of course) a nice Python package called TTX/FontTools that can help us out. It encapsulates all the relevant data tables, as they are called, but it’s still fairly close to “the metal” and rather difficult to get started with.

The main use-case for TTX/FontTools seems to be TTX, which is a command-line tool for converting TrueType files into a corresponding XML-format and vice versa. Users can then manipulate a font in various ways using a basic text editor rather than sophisticated font editor programs, where it can be difficult to see what actually happens to the font behind the scene. But for our particular use-case we are not interested in the tool itself, but rather what makes it tick. It is really difficult to find any documentation or tutorials for this package. Especially if one wants to create a new font from scratch instead of just editing an existing one. I’ll get back to this later.

This post is meant as an introduction to the subject. All the dirty details will be fleshed out in upcoming posts. I have implemented a conversion tool in Python and if you can’t wait for the details, you can have a sneak-peek of the code on GitHub.

The problem in a nutshell

OK, so how do we get from a C64 memory dump containing some 8×8 pixel bitmapped characters to a usable TrueType file? The problem can be split into the following sub-problems:

  1. Vectorizing the 8×8 pixel bitmaps into glyph into a set of contours.
  2. Mapping from the native C64 format into ASCII (and Unicode).
  3. Generating the actual TrueType file using TTX/FontTools.

I’ll address these three sub-problems across the next three blog posts.

Useful software:

  • Python – A very nice programming language. Like Perl but less painful and much prettier.
  • TTX/FontTools – Without this package I probably wouldn’t have bothered with TrueType.
  • FontForge – A TrueType font editor. Nice for checking the sanity of font files.

If your operating system is a derivative of Debian Linux (like Ubuntu or Linux Mint) then Python is probably pre-installed and the other two packages are easily installable through the built-in package system. It’s also pretty easy to get it to work in Mac OS X. It probably also works in Windows, but then you’re on your own..

Useful links:

The TrueType file format at a glance

It seems that the file format specification varies a bit depending on who you ask. Traditionally, there are three big players in this field, Microsoft, Apple, and Adobe, and they don’t agree 100% on what a proper TrueType file should look like. I will primarily be using Microsoft’s definition, as Apple’s specification on required tables in the file lacks the “OS/2” table, which is used by Microsoft Windows itself as well as Microsoft Internet Explorer when loading fonts from a website. There are some licensing bits in here that tells Internet Explorer if it’s OK to download and use this font.

Basically, a TrueType file is a set of tables. Each of these tables describe a certain aspect of the font. For my particular purpose I can leave out features like kerning, hinting, ligatures, and all other fancyness that’s useful for working with proportional fonts. My goal here is to convert monospaced 8×8 pixel bitmaps into proper TrueType glyphs. The required tables for a bare-bones font are as follows:

Table nameTable description
cmapCharacter to glyph mapping
glyfGlyph data
headFont header
hheaHorizontal header
hmtxHorizontal metrics
locaIndex to location
maxpMaximum profile
nameNaming table
postPostscript information
OS/2OS/2 and Windows specific metrics

A detailed description of these tables are outside the scope of this post, but it’s all there in the specifications I linked above. As mentioned earlier, I didn’t succeed in finding a tutorial for creating font files from scratch using TTX/FontTools. It requires a deep knowledge of the TrueType format, but it can be done by reading the FontTools code (as well as the specifications) and doing some trial-and-error using the XML output feature. Basically you just need to fill in all the data mentioned in the specification. There are very few shortcuts in the process. But more on this in a later blog post…

In my next post, I’ll discuss the vectorization algorithm for converting a 8×8 pixel bitmap into a set of polygon contours. Stay tuned…

Creating a Python module for the Beurer BM 65 blood pressure monitor (Part I)

So, I just bought a brand spanking new blood pressure monitor. My wife is a nurse and we have been talking about getting one for some time. After browsing the market, we settled on a Beurer BM 65. It is a very nice piece of kit and it comes with a USB plug for PC connectivity. Exciting, right? Unfortunately, the software is Windows-only. Bummer..
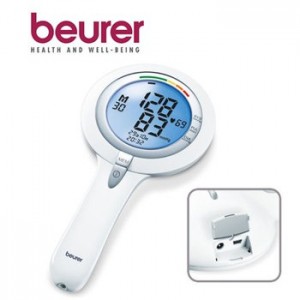
Beurer BM 65

Beurer BM 65

Well, then it’s obviously my duty to reverse-engineer it. Let’s get started then! A quick Google search tells me that others have had success with the Beurer PM70 (a heart rate monitor) and success with the Beurer BG64 (a diagnostic scale). They seem to use different protocols, though.

Reverse engineering the protocol

When the BM 65 is plugged in, it enumerates as 067B:2303, which is a Prolific Technology PL-2303 USB-to-serial controller. Interesting.. The problem is therefore reduced to guessing the serial protocol it uses.
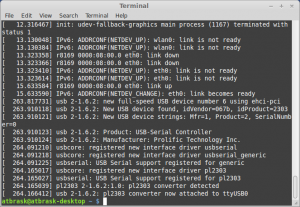
Output from dmesg

Output from dmesg

On my Linux box it gets mapped to /dev/ttyUSB0 with no issues, as this chip is supported in the kernel. But how to communicate with it? We need to sniff the protocol… Beurer provides a free Windows-only tool called Health Manager for communicating with the device, as well as a subset of their other products. Luckily, it’s possible to eavesdrop on serial ports in Windows, and my gaming rig runs Windows 7. There is a SysInternals tool for this called Portmon, but it seems to work very poorly on Win7 x64. Next, I tried a tool called API Monitor v2. As the communication with the device is through a fake serial port, we should be able to sniff the relevant Windows API calls.

Lo and behold! It works! It seems that SetCommState in Kernel32.dll is used to configure the COM port (4800 baud 8N1).
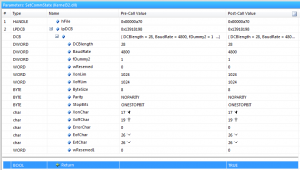
4800baud

The SetCommState call where the serial connection is set up to 4800 baud 8N1.

Let’s then see if we can deduce the actual communication.. After some digging around I successfully limited the captured API calls to just the file I/O stuff in Kernel32.dll. The Health Manager tool tries all available COM ports until it gets a correct response. After that, we just have to follow the yellow brick road of WriteFile and ReadFile API calls. It only writes 1 or 2 bytes per call (depending on the command) and all reads are single byte reads.
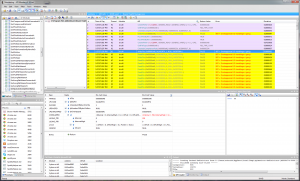
Serial data transfer

Serial data transfer

This API Monitor tool is a bit tedious for this, so I tried Serial Port Monitor by Eltima Software instead. It is a shareware program with a 14 day trial, but that’s enough for this purpose. A serial dump of a sequence of 3 measurements looks something like this:
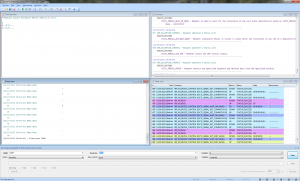
Captured serial communication

Captured serial communication

In table form, transferring a set of three measurements goes like this:

Sent to deviceReceived from deviceMy interpretation
0xAAPing?
0x55Pong!
0xA4Get description
"Andon Blood Pressure Meter KD001"Device description
0xA2How many measurements?
0x033 measurements!
0xA3 0x01Get measurement 1
0xAC 0x66 0x37 0x4E 0x0A 0x11 0x16 0x2A 0x0DMeasurement 1!
0xA3 0x02Get measurement 2
0xAC 0x62 0x35 0x5F 0x0A 0x0E 0x12 0x0C 0x0DMeasurement 2!
0xA3 0x03Get measurement 3
0xAC 0x64 0x3D 0x55 0x0A 0x0C 0x0E 0x09 0x0DMeasurement 3!

After the last byte, the connection is terminated. Apparently, this device is made by a company called Andon. And it seems that it only transmits data about a single user at a time. Let’s have a look at a single measurement:

Byte valueMy interpretationDescription
0xAC0b10101100Status bits? Magic number?
0x66102 + 25 = 127 mmHgSystolic blood pressure (offset by 25)
0x3755 + 25 = 80 mmHgDiastolic blood pressure (offset by 25)
0x4E78 BPMPulse
0x0A10 = OctoberMonth
0x1117Day of month
0x1622Hours
0x2A42Minutes
0x0D13 = 2013Year

And Bob’s your uncle! We have now successfully reverse engineered the protocol. Well.. Almost.. I haven’t got a clue about the first byte of each measurement. It might be a magic number, but it’s probably some status bits. Besides blood pressure and pulse, the device also registers cardiac arrhythmia. If this information is recorded and if a measurement is always 9 bytes, it would have to be stored in these bits.

I mentioned that the device seemed to be made by Andon. After a bit of digging, I found some evidence for this. The document from dabl Educational Trust says:

“Andon is an OEM manufacturer for the BM 65. Despite the different designs, the BM 65 is functionally the same as the Andon KD-5915 with added dual user, averaging and uploading features but without the voiced results.”

It seems that some of the other Andon devices also support USB. I wonder if the protocol is the same as for the BM 65?

Implementing a Python module for the Beurer BM 65

Let’s make a rudimentary data downloader in Python using our newly acquired knowledge about the protocol. I’m using Python 2.7 on a reasonably new Linux Mint installation. The code is reasonably basic, omitting any kind of error handling.

For those who don’t want to copy code from here, you can also pull a copy from GitHub.

Disclaimer:
The code is free to use, but do so at your own risk.
If you brick your device, it’s not my problem.

[code language=”python”]
import sys, serial

class Measurement(object):
def __init__(self, data):
self.header = data[0]
self.systolic = data[1] + 25
self.diastolic = data[2] + 25
self.pulse = data[3]
self.month = data[4]
self.day = data[5]
self.hours = data[6]
self.minutes = data[7]
self.year = data[8] + 2000
self.time = “{0}-{1:02}-{2:02} {3:02}:{4:02}”.format(self.year,
self.month,
self.day,
self.hours,
self.minutes)

def getBytes(self):
return [self.header,
self.systolic – 25,
self.diastolic – 25,
self.pulse,
self.month,
self.day,
self.hours,
self.minutes,
self.year – 2000]

def __repr__(self):
hexBytes = [‘0x{0:02X}’.format(byte) for byte in self.getBytes()]
return “Measurement([{0}])”.format(‘, ‘.join(hexBytes))

def __str__(self):
return “\n”.join([“Header byte : 0x{0:02X}”,
“Time : {1}”,
“Systolic pressure : {2} mmHg”,
“Diastolic pressure : {3} mmHg”,
“Pulse : {4} BPM”]).format(self.header,
self.time,
self.systolic,
self.diastolic,
self.pulse)

class BeurerBM65(object):
def __init__(self, port):
self.port = port

def sendBytes(self, connection, byteList, responseLength = 1):
connection.write(”.join([chr(byte) for byte in byteList]))
response = connection.read(responseLength)
return [ord(char) for char in response]

def bytesToString(self, bytes):
return “”.join([chr(byte) for byte in bytes])

def getMeasurements(self):
ser = serial.Serial(
port = self.port,
baudrate = 4800,
parity = serial.PARITY_NONE,
stopbits = serial.STOPBITS_ONE,
bytesize = serial.EIGHTBITS,
timeout = 1)

pong = self.sendBytes(ser, [0xAA])
print “Sent ping. Expected 0x55, got {0}”.format(hex(pong[0]))

description = self.bytesToString(self.sendBytes(ser, [0xA4], 32))
print “Requested device description. Got ‘{0}'”.format(description)

measurementCount = self.sendBytes(ser, [0xA2])[0]
print “Found {0} measurement(s)…”.format(measurementCount)

for idx in range(measurementCount):
yield Measurement(self.sendBytes(ser, [0xA3, idx + 1], 9))

print “Done. Closing connection…”
ser.close()

if __name__ == “__main__”:
conn = BeurerBM65(sys.argv[1])
for idx, measurement in enumerate(conn.getMeasurements()):
print “”
print “MEASUREMENT {0}”.format(idx + 1)
print measurement
[/code]